|
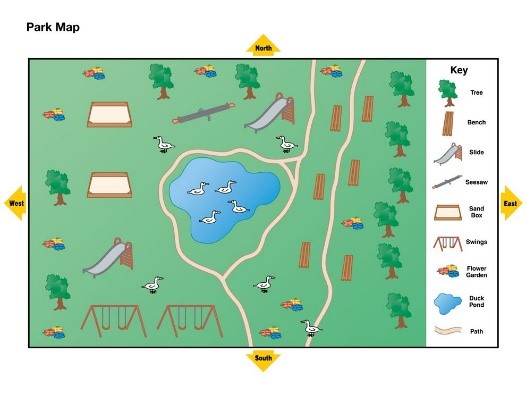
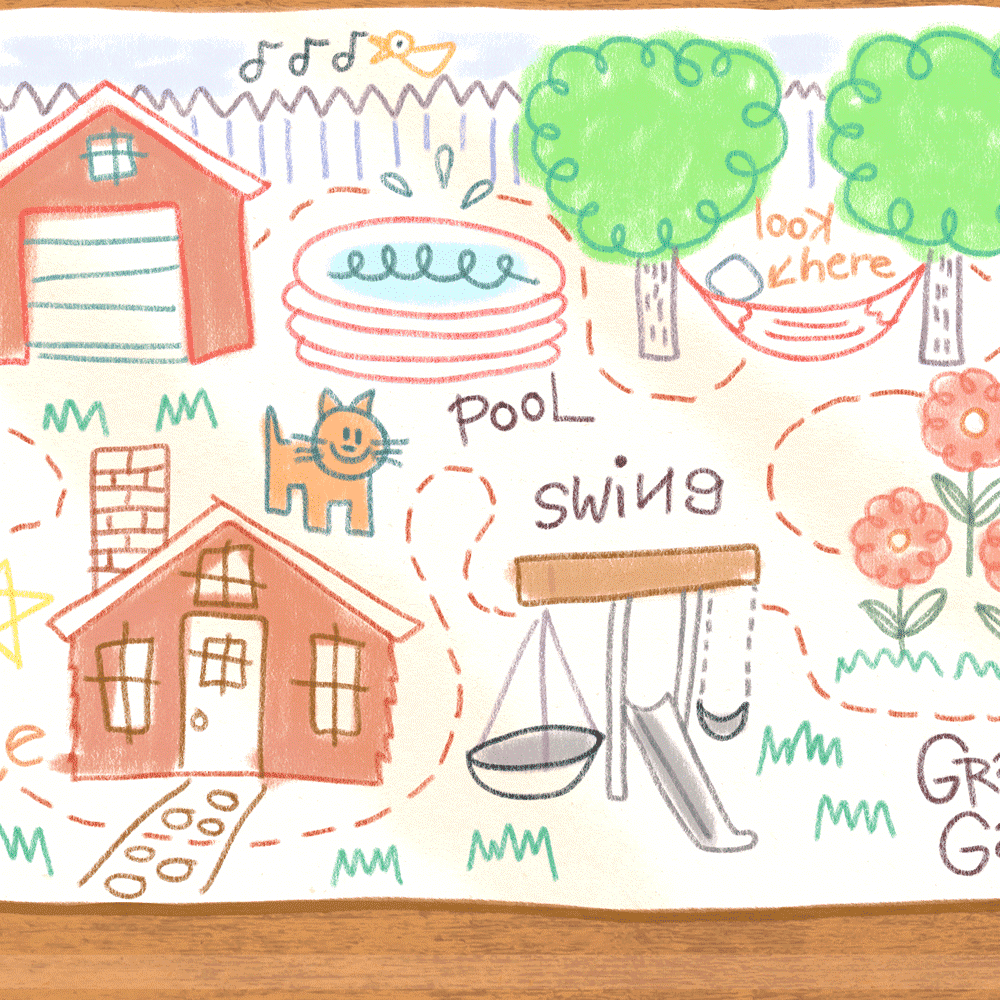
Year 1 - Term 1, Week 8 In the Mathematician Centre students have enjoyed planning and creating maps of their day. Students have represented their maps in various ways using drawings, labels, times, and visual schedules. This week’s focus is to give students some direction and opportunities to further their learning and move to the ‘what’s next’ part of our learning. The focus will be on early introduction of ‘mapping’ concepts and understanding of how maps work, as well as ‘what other maps can be created to reflect about themselves’. Drawing maps introduces children to spatial relationships and representation; where things and places are in relation to other things, as well as early mapping skills and vocabulary. Introduction: Look at the ‘Together we…’ flowchart. Explain to students that to be successful learners in learning centres, we need to work through each process/step of the flowchart. We need to read the prompt carefully, then Plan, Create, Share and Think what’s Next in our learning. Explain that today we will be looking at the Think what’s Next in our learning.  Explain to students that a map is a drawing of a place, and maps convey information. Most maps are drawn as if you are looking down from above or an aeroplane. Discuss the various types of maps eg. map of your bedroom, park, street maps, shopping centre maps, school maps, countries, weather etc Introduce the story ‘Mapping my day’ by Julie Dillemuth. Ask students to notice how the little girl has drawn maps to show parts of her day. https://www.youtube.com/watch?app=desktop&v=Sxnisk4-H58 https://www.getepic.com/app/read/72634  Discuss- the different maps the little girl has drawn to represent parts of her day. TPS -Have students think about their day. Ask students to choose one aspect of their day/or day on the weekend that they would like to map. eg they could map their bedroom, their family, where they sit with the family to eat, their backyard, garden, park etc Show the students the criteria of 'what to include on your map'. Explain that students need to add the following when creating their maps. These include: a title to show what your map is about, drawings as if you are looking down from above, map symbols or a key, labels on your map and a compass rose. Display- some examples of maps. Look at the similarities/differences. Talk about the features on the maps. Eg aerial drawings, labels, compass rose, symbols, arrows etc Teacher models- Choose an event from the day to represent in the form of a map. Show the students how to draw the map using the elements discussed above. Discuss how big the objects are in relation to each other. Include elements of direction, symbols and labels.
Share - Students share their map of an event during their day with year 1 during reflection.
0 Comments
 Introduction/explicit learning (Linked to syllabus)
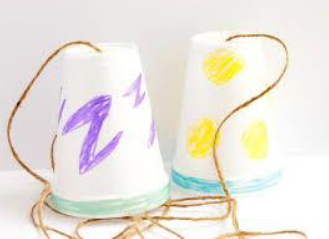
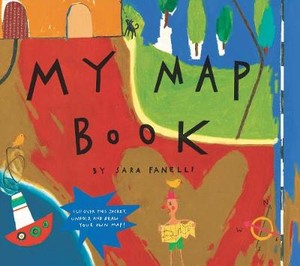
EN1-10C thinks imaginatively and creatively about familiar topics, ideas and texts when responding to and composing texts. ST1-2DP-T uses materials, tools and equipment to develop solutions for a need or opportunity. Inventors Prompt: Can you make a telephone to communicate with a friend? How does it work? Year 1 had the opportunity over the last couple of sessions to plan, collaborate and create string telephones in the inventor’s center. It was noticed that the students were finding it challenging to work ‘what’s next’ after they created, decorated and experimented with their phones. This week’s focus is to give students some direction and opportunities to further their learning and move to the ‘what’s next’ part of our learning. Introduction: Look at the ‘Together we…’ flowchart. Explain to students that to be successful learners in learning centres, we need to work through each process/step of the flowchart. We need to read the prompt carefully, then Plan, Create, Share and Think what’s Next in our learning. Explain that today we are going to focus on what’s next in our learning once we have finished creating our sting telephones. Display- the explanation/steps on how to make a string telephone on the IWB. Watch video - The Science of the String Phone! - https://www.youtube.com/watch?v=3yqB2KFwJCo -Explain that once they have made the string phone their job is to experiment with how it can be used. -They may talk into the phone and ask their partner to write down the message they heard, in order to test if it works. -They can try using a different cup (paper or polystyrene) to test which material works better. -Model how to write a sentence about which phone worked best. Display -some challenges students may try on the IWB. For example, try making a 3 way telephone and write about how to use it. TPS- Why it may be important to write an explanation on how to use the phone for someone who has never used a string telephone? Teacher models- how to write an explanation on how to use a string telephone for a friend to follow, once they have completed their experiments/challenges. Explain how to think about each step by first role playing using the phone and then drawing the image and writing the explanation to match for each step. Students TPS- how they may explain each step in their own words using action words at the start of each step. Teacher explicitly models- how to write an explanation using the student’s responses. Share with year 1 during reflection. Year 1 - Term 1, Week 7 In the Mathematicians centre students have started to explore the concept of ‘mapping their day’. They have been provided with an example of a map of a daily schedule, as well as used the ‘Map of my day’ page in the book: ‘My Map Book’ for ideas. Students enjoyed exploring mapping out their day, but I noticed that there was no organisation or daily events shown in the right order or followed a sequence showing morning, day, afternoon and night. Introduction: Revisit the prompt: ‘Can you create a map of your day?’ Read through the criteria with the students. Tell students that today’s Learning Centre intro will be focusing specifically on the criteria; ‘Show your day in the right order using words and pictures’. Use the example below of a student’s ‘map of their day’ that has been created in a previous LC session. Read the map of their day to the students. Woke up at 7:00 Learn how to read Wash my face Have recess Brush my teeth Go to the park Put my school uniform on Play soccer on Nobbs at lunch Have a shower Read a book Get ready for school Have a shower Walk to school Go to bed Have breakfast TPS: Ask students to think about whether this example shows the day in the correct order using words and pictures. Discuss student responses. Possible questions to ask are ‘Would you change into your school uniform before you have a shower?’, ‘Do you have your breakfast after going to school?’, ‘Would you go to the park during school hours?’. Explain to the students the importance of reading the prompt carefully to achieve success in our learning. Read the story or watch the video of ‘My Map Book’ by Sarah Fanelli. (Stop after the section of ‘Map of my Day’. https://www.youtube.com/watch?v=rCkkgTSAA5U TPS: Pose the question; ‘What is a map?’ Discuss student responses. Point out the fact that maps can show concepts, events of their day in the correct order, can show their family members, can be a drawing to represent their bedroom etc. Display the pages outlining ‘Map of My Day’ from the book. Explain to the students that the author has used writing and pictures in a sequential order to show the audience how her day is organised and we can follow the path of her day just like in a real day. Explicitly point out: - The day is in sequence of what happens first, next, after that etc. Time passes as we move down the page. - The pictures give us lots of information about the author’s day. Model: ‘I know that the author brushes her teeth first thing in the morning by looking at this picture. It makes me think about the first thing I do in the morning. If this was my map, I could draw a toothbrush too but I could also draw a hairbrush or a picture of myself getting out of bed. - How the author has divided her map into two paths- one for school days and one for weekends. - In the playground section, the author writes ‘my favourite games’ but we don’t have any information about what that might be. TPS: If this was your map what could you add to give more detail about what that might be. - Discuss how the author used creativity in mapping out their bedtime. They wrote the word dream, each letter in a star. Where to next: TPS: Ask student to think about how the author could improve their map to make it better and have the audience clearly see the author’s day in the right order. Examples may include using time to show order of events, using subheadings such as morning, day, afternoon and night or using arrows to show the correct order of events in your map. Have students reflect upon their maps and think of how they can improve their ‘map of their day including some of the above examples. Show the students the example ‘map of my day’ which includes time, pictures, words and arrows to clearly show map of the day in the correct order. Introduction/explicit learning (Linked to syllabus)
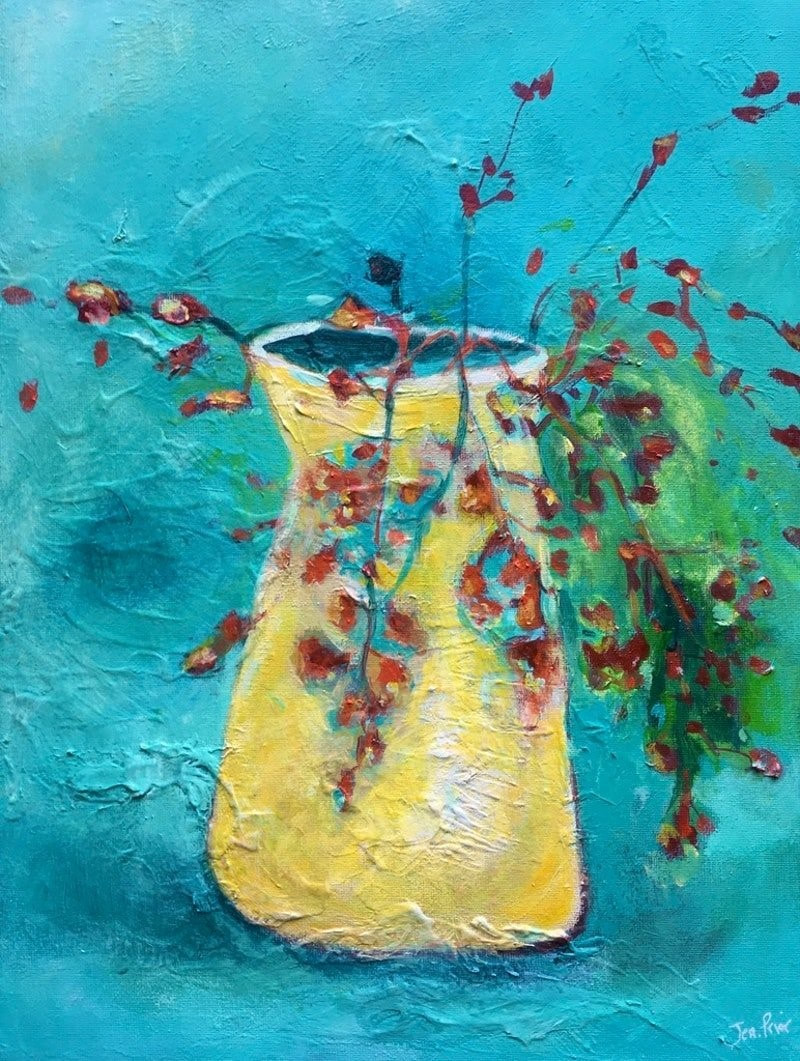
VAS1.1 Makes artworks in a particular way about experiences of real and imaginary things. Prompt: Artists: Can you paint a portrait of yourself to share with others? Year 1 have had the opportunity over the last couple of sessions to familiarise themselves with the resources at each centre and collaborate to plan a quality creation. At the artists centre, it was noticed that the students were finding it challenging to draw their head and facial features using the correct proportions. They were not able to use the quadrants on their blank page to assist them in drawing the circle, and facial features in the correct position in relation to their face. The book and examples provided proved difficult for them to follow without the additional supported instruction by a teacher. Students were able to look at themselves in the mirror to identify their features but weren’t successfully noticing the position of their features and were mostly free drawing on their quadrants. They were not noticing the shape/ contour of their features either and were rushing their drawing in order to paint. Students were given feedback and were asked to look carefully at how each quadrant positions certain facial features and attempt to draw a second draft to improve on the position and features of their first attempt. In this session we will focus further on how good artists improve their work by looking carefully and noticing the details to improve on in order to make it look as realistic as possible. Introduction: Explain to the students that today’s learning center focus is based around ‘Planning’ and ‘Creating,’ of their own self-portraits in the Artists Centre, using a mirror and book to help them. Look at the ‘Together we…’ flowchart. Explain to students that to be successful learners in learning centers, we need to work through each process/step of the flowchart. We need to read the prompt carefully, then Plan, Create, Share and Think about what’s next in our learning. Read the prompt: Can you paint a portrait of yourself to share with others? to the students and discuss each bullet point so that students understand what is required of them. Discuss the importance of the planning phase. Explain that artists spend the majority of their time planning, noticing, drawing and redrawing until it looks as realistic as possible. Discuss the importance of getting the feedback of their peers in order to notice something that they can correct and improve on in their drawing. Play the video Austin’s butterfly- https://www.youtube.com/watch?v=hqh1MRWZjms TPS- What does it mean to do an accurate scientific drawing? -Discuss why it’s so important to notice details and draw accurately. TPS- Why is it important to get feedback or critique from our friends? Display 1 student’s draft drawings on the board (x3) and 1 final painted portrait- Discuss the changes that have been made in each drawing and how the portrait was improved. Students are to TPS- further critique/ feedback on how to improve the portrait. Discuss feedback. Teacher explicitly models- how to look at each quadrant on the page and following the in the example in the book to draw a dot/line to mark each feature’s positon on the quadrant. Teacher ten models how to observe and draw details of each feature. Look at a child’s first, second and third attempt. Improve the shape, size, and position and finally colour of previous drafts by carefully noticing/ critiquing previous techniques. TPS- How did taking on feedback improve the final draft? Look at the next step in the flowchart, ‘Create’. Students then look at their creations from previous lesson and ‘create’ a new draft with improvements. They then follow the steps to get feedback and create a final copy. Share- with year 1 during reflection. 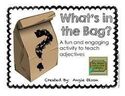 Year 1 - Term 1, Week 6 Year 1 students began the year by sharing, ‘Me in a bag’ items with their peers in the class. An all about me bag is a fun way to help students and teachers get to know each other. The ‘where to next’ learning for this experience was to integrate this activity into the Authors Centre, so students could use the items to create a book about themselves. Encouraging children to write a story of their very own can give them an enormous confidence boost, as well as help them consolidate their literacy skills. After introducing the Author’s Centre last week and allowing the students to manipulate the prompt and resources, it was noticed that the students faced some challenges with how to use their ‘Me in a bag’ items to create a book about themselves. There was also no evidence of students working through the ‘Together we…’ flowchart, as students went straight to the resources and began to draw the items in their bag. Introduction: Explain to the students that today’s learning centre focus is based around ‘Planning’ and ‘Creating,’ of their own stories about themselves in the Authors Centre, using the items in their bag. Look at the ‘Together we…’ flowchart. Explain to students that to be successful learners in learning centres, we need to work through each process/step of the flowchart. We need to read the prompt carefully, then Plan, Create, Share and Think what’s next in our learning. 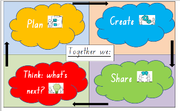 Read the prompt: ‘Can you make a book about yourself?’ to the students and discuss each bullet point so that students understand what is required of them. TPS: Students discuss an appropriate title for their books and what could be included in their ‘All about me books’. Brainstorm students’ responses. Teacher scribes on butcher’s paper. eg. draw and write about each item in the bag and why its important to you. Additional information may also be included such as; your likes/interests or hobbies, members of your family, activities you enjoy doing, your favourite sport, your friends etc. Point out the first step in the flowchart; ‘Planning’. Explain to students that they need to first discuss and plan their ideas before even attempting to create their own books. Show the students the ‘Planning Sheet’. Teacher demonstrates how this tool can be used to assist them to think about, discuss and draw/label their ideas prior to creating their personal stories/books. Look at the next step in the flowchart, ‘Create’. Discuss and demonstrate how the planning sheet can be used to assist the students when making their own stories/books about themselves. Talk about the pictures drawn in each box to represent each item that will be included in their books and how the labels or key words written next to their drawn items can assist them in writing a matching sentence. Also discuss, the importance of detailed drawings so the audience reading their story can see the real representation of what their items in their bag look like. Teacher reads their own version of ‘All about me’ book to the class to show the students what a final published version may look like. 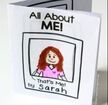 Remind students to begin their learning today actively engaged in the ‘Planning’ process in all the Learning Centres.
Noticing:
Students are familiarising themselves with the learning intention and success criteria so they can be successful during learning centres. We noticed last week that students have started to ask questions. Most of the students know where to find them, if they can not come up with their own. However, after their question, students are finding it difficult to investigate successfully. Some students are copying sentences from books and not recording their findings on paper or any medium. This is mostly occurring in scientists as they explore facts and information about Kangaroos. Therefore for this intro, it would be beneficial for students to explore the second step of their inquiry where they "plan, gather ideas, and research" Review our learning intention "WALT: to deepen our learning through the inquiry process". Ask students "how can we be successful in achieving our WALT?" Students think pair share. When students are sharing listen to their commentary and discussion. Select students how have a strong understanding and reinforce the importance of having a question and focus so they do not feel lost and not know what they are doing. Display the inquiry quadrant. Explain to the class what you noticed (refer back to noticing) . Today I am going to show you one way you can "plan, gather ideas, and research". As a scientists I will be exploring the following question "How can I find out about Australian animals?". Refer back to quadrant and tick the first step. Now that I have my question, what can I do next? Student think, pair and share. Anticipated student responses may include: - look at what we have on the table -read the books - use the ipad - draw a picture e.c.t Model how you can gather information by reading the text (https://explorer-mag.nationalgeographic.org/pioneer_march_2021/mismash_mammal_4). Why am I reading this text? is going to help me answer my question? Read the text. How can I remember all of this information. What is this text telling me about platypus? Draw a quadrant with Diet, appearance, what else can I add? Read sentences and identify key point and phrases. for example under the title "Tail and Eyes" write down tail, storage, scarce as key words. Return to inquiry chart and tick the second quadrant. Ask as a learner today what can I do next? Discuss potential ways of sharing our planning. Write some sentences, draw a labelled picture, record findings on I-pad e.c.t. Introduction/explicit learning (Linked to syllabus) ST1-2DP-T uses materials, tools and equipment to develop solutions for a need or opportunity. Design and Production/Producing and implementing
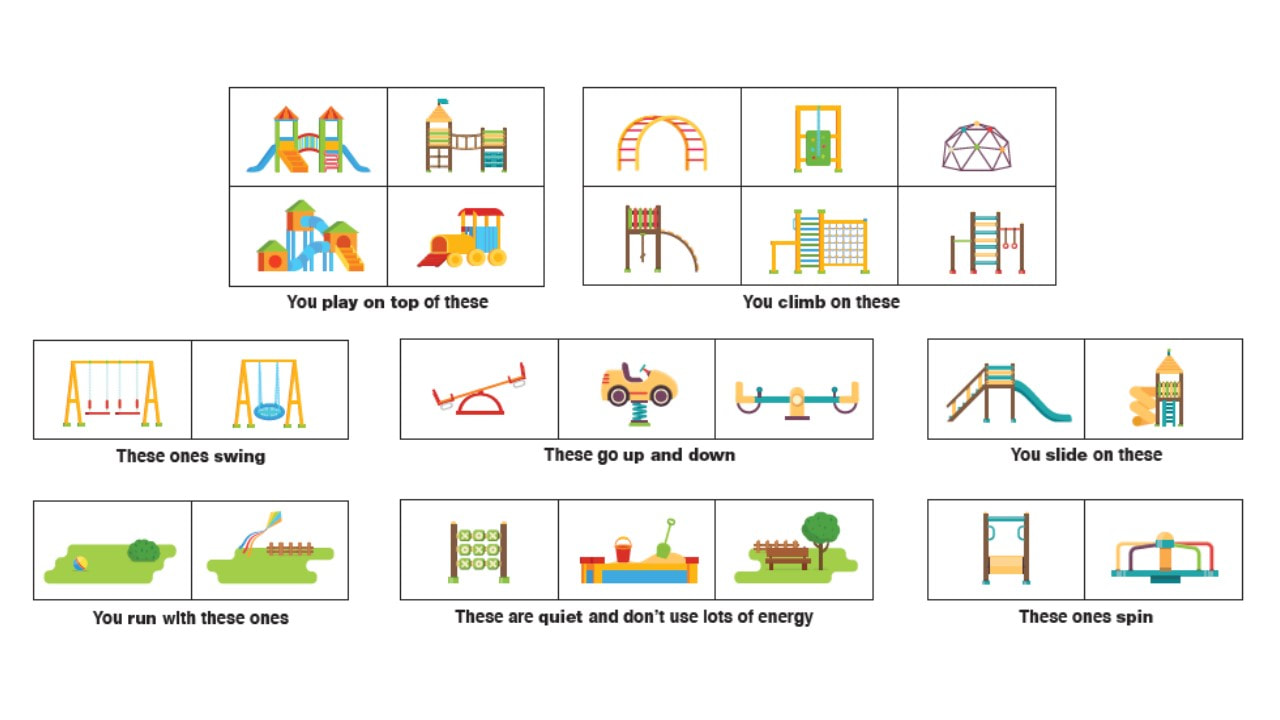
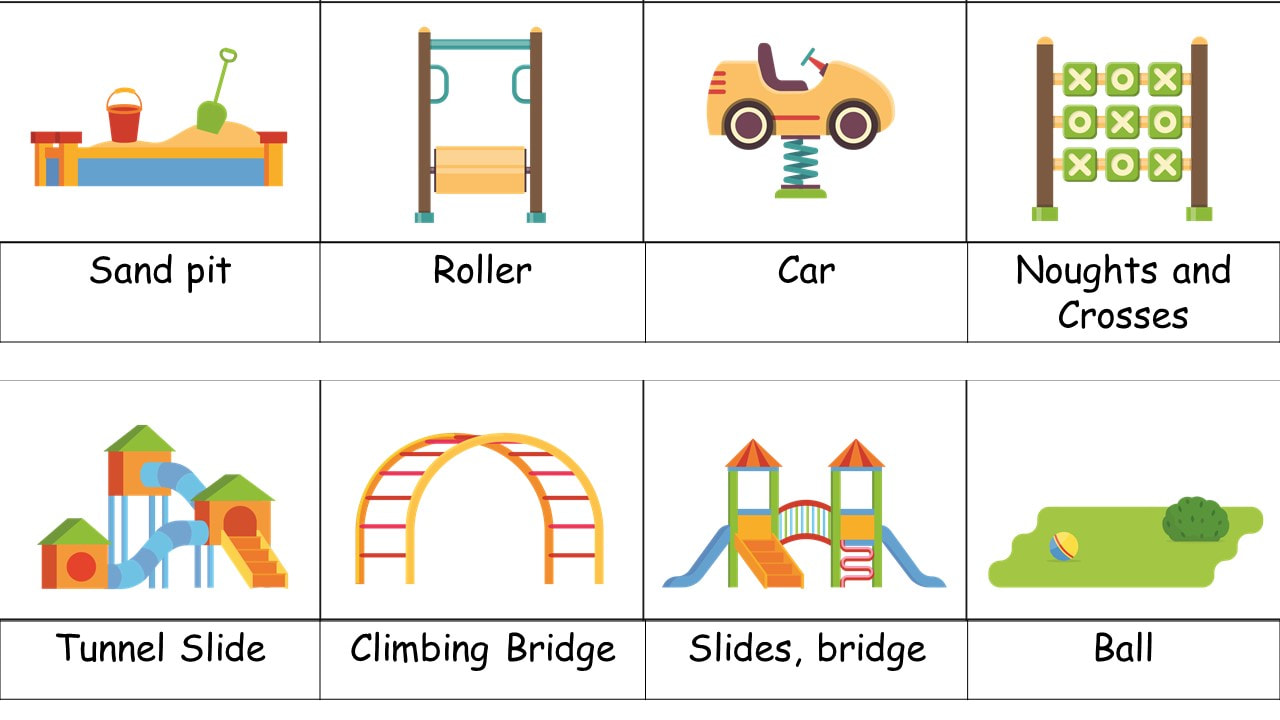
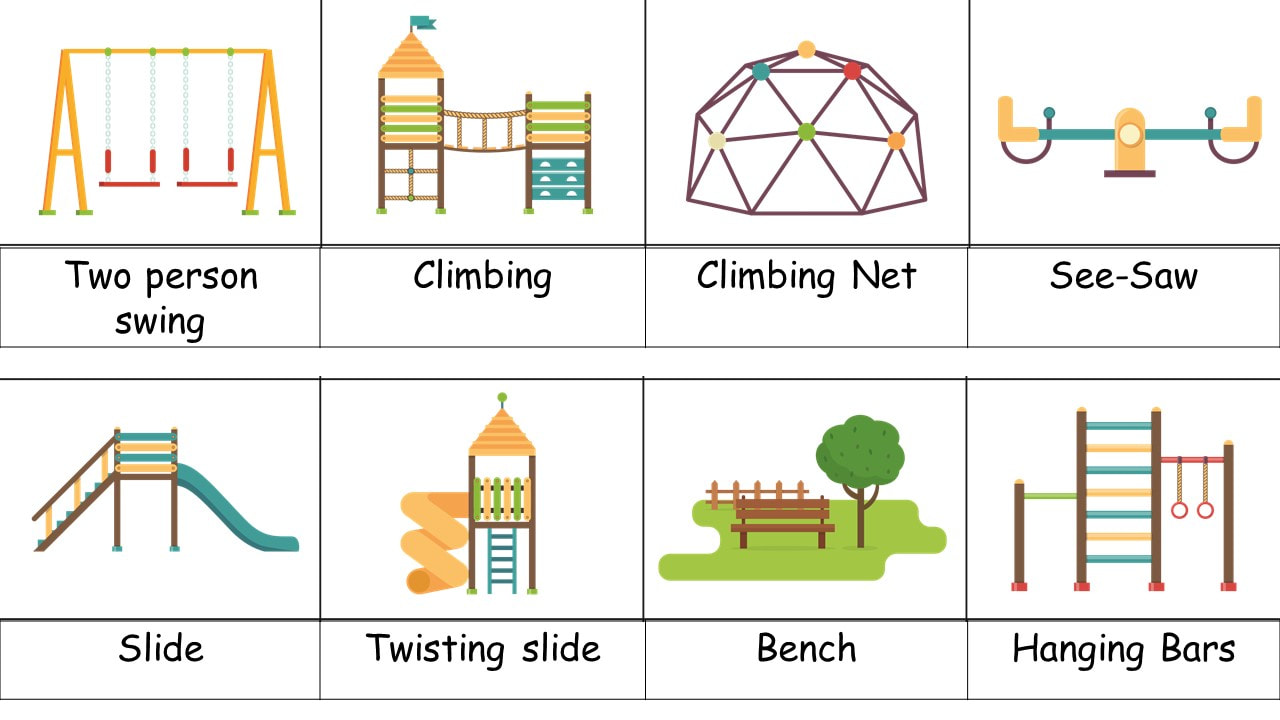
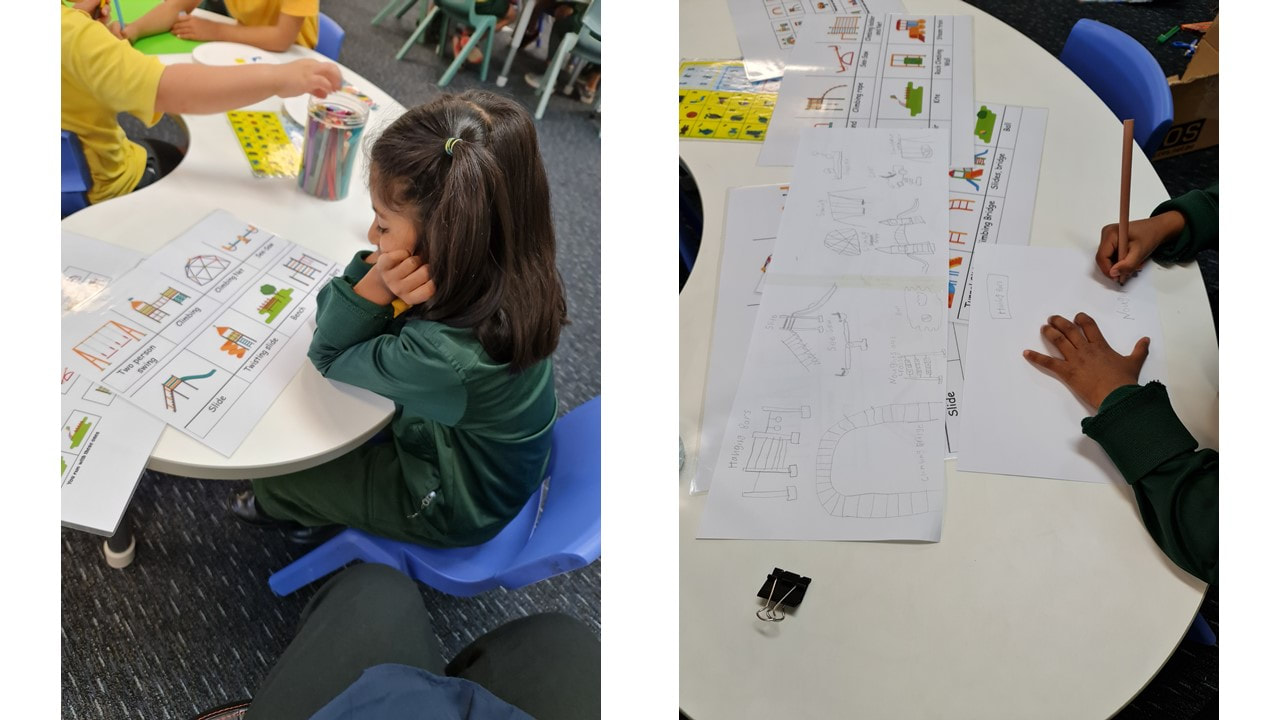
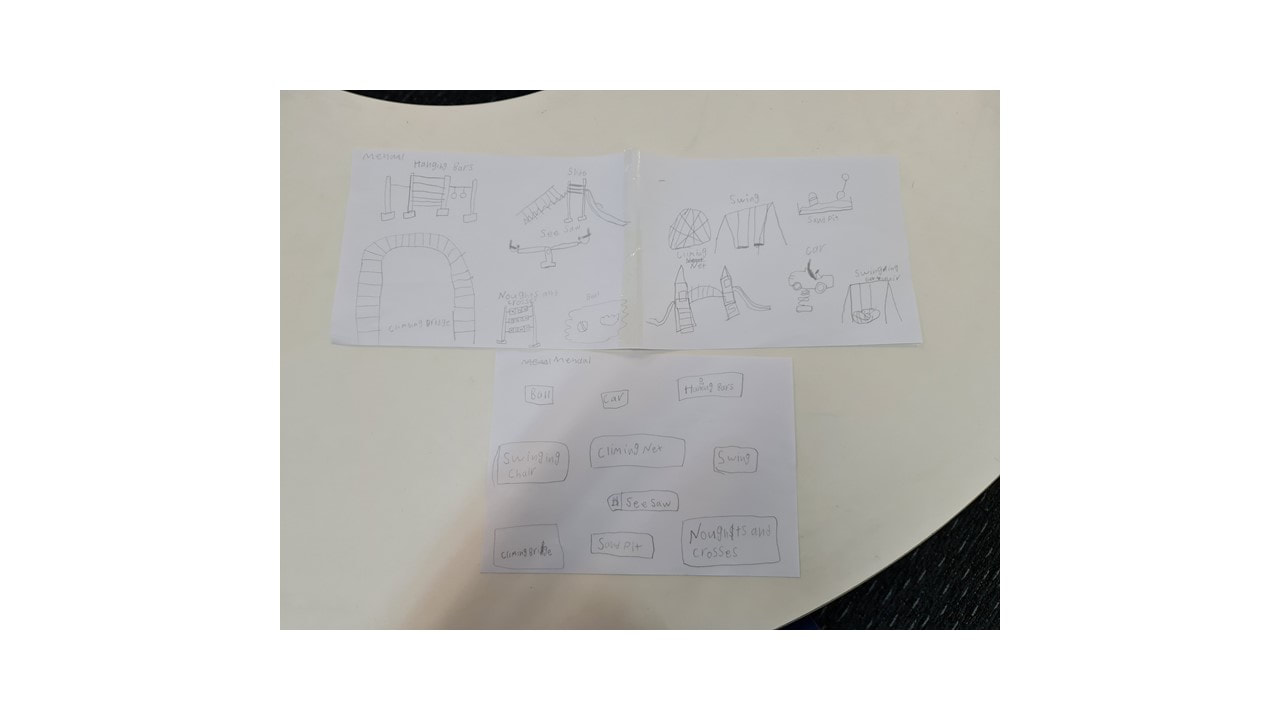
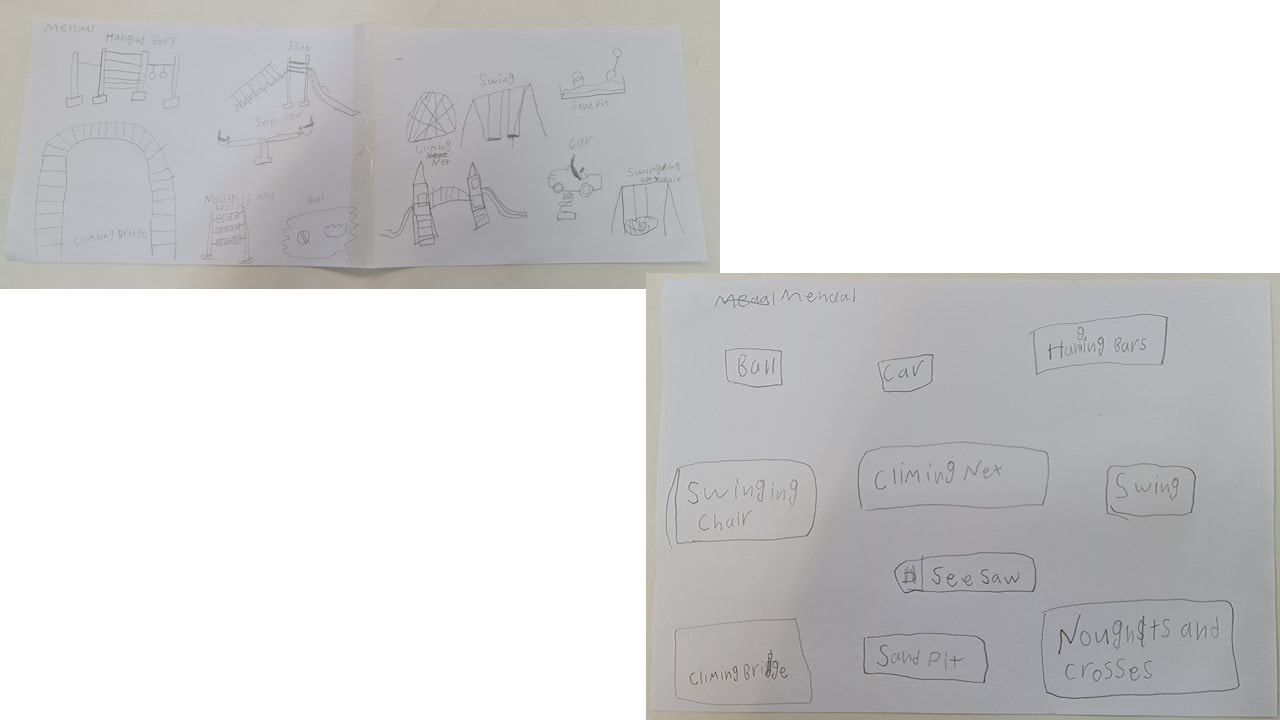
Inventors: Design a Playground!
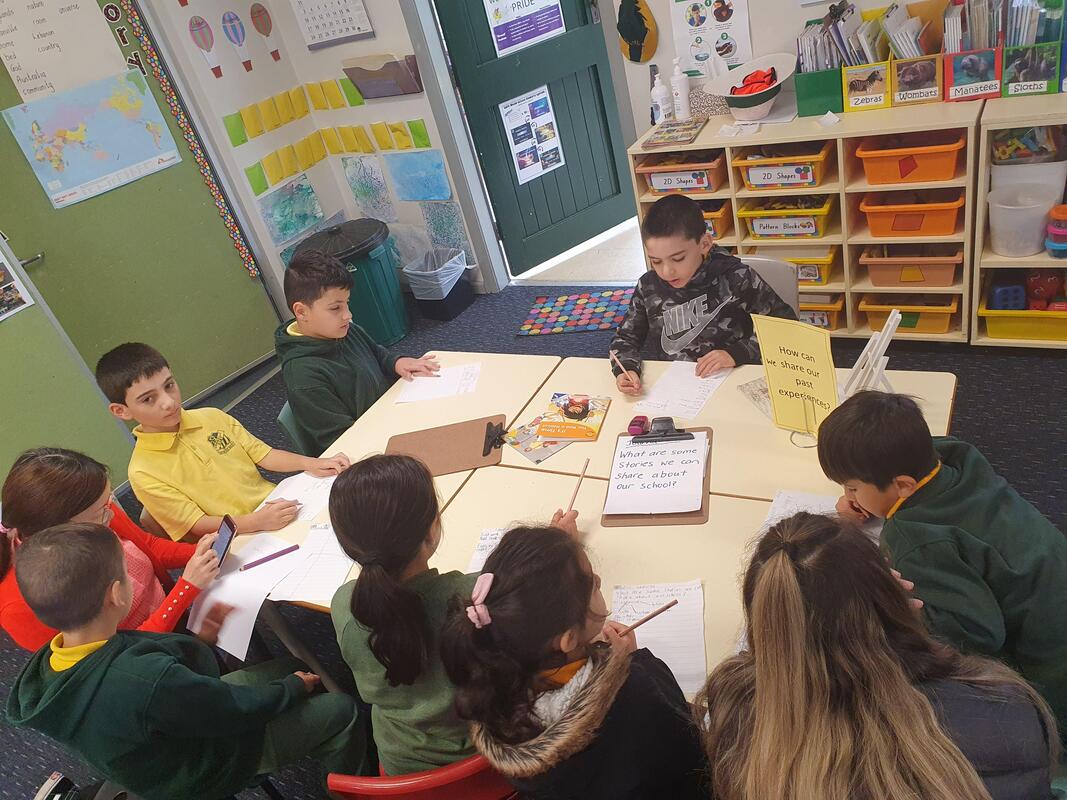
What does the available resources look like in the different centres: Explorer’s Centre: Coloured Food dye, Containers Author’s Centre: Felt boards and animal figurines Mathematics Centre: Counters, cookie shapes Teacher to take note of students using materials to help make their ideas successful.  In the Historians centre students have been investigating and exploring different artefacts from the past. So far students have been comparing an artefact from the past to a modern day object (gramophone and CD player).
But Artefacts can also give insight to how people lived and behaved. Students can discover clues to how people in the past lived. They can use their own experiences to compare and contrast how others lived. Ask the students: "If I had never met you and walked into your bedroom, what would I know about you from the things you have there? Would I know if you were a boy or a girl? Would I know what your interests are? Would I know if you share your room?" Now ask students to think of something in their bedroom that is very special to them. How does that object tell something about you, along with everything else in your room?" Everything together tells about you because it is in context. You have selected certain things to have, and these things tell about you when they are all found together." Explain to students that an artefact is an object from the past that has since been used, modified or moved by someone. We have been exploring different artefacts in the Historians centre and examining how it works and its features. Display some previous work from students from the Historians centre. But we haven’t been exploring what we can learn about people, their behaviour, who they are from that artefact. Today we are going to be exploring what information we can gather about people from the past from these artefacts. Display some images on the IWB of technological artefacts from the past. As the students view them have them think about;
2. In the geographers’ centre, our students have been exploring features of places and exploring different environments. We noticed that some of our students needed to move their learning forward by understanding their role as a geographer. They knew how to talk about features of an environment but needed to move their learning forward by understanding the importance of raising awareness on how we can care of our environment. |
|||||||

| geographers_week_5.pptx |
EN1-8B recognises that there are different kinds of texts when reading and viewing and shows an awareness of purpose, audience and subject matter – understand how text structure contributes to the meaning of texts.
EN1-7B identifies how language use in their own writing differs according to their purpose, audience and subject matter – understand that different types of texts have identifiable texts structures and language features that help the text serve its purpose.
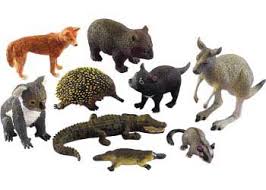
Explain to students that they have been learning how to write retells of the stories they have been reading. Today we are going to learn how to use all the things we know about retelling stories to help us write our own stories (narratives). Explain the word narrative is another name for story. Read through prompt for Authors centre. Show students the bag with Australian animals and the books about Australian animals.
TPS: What is the structure of a narrative? What are the 3 parts that stories have? Orientation, complication, resolution.
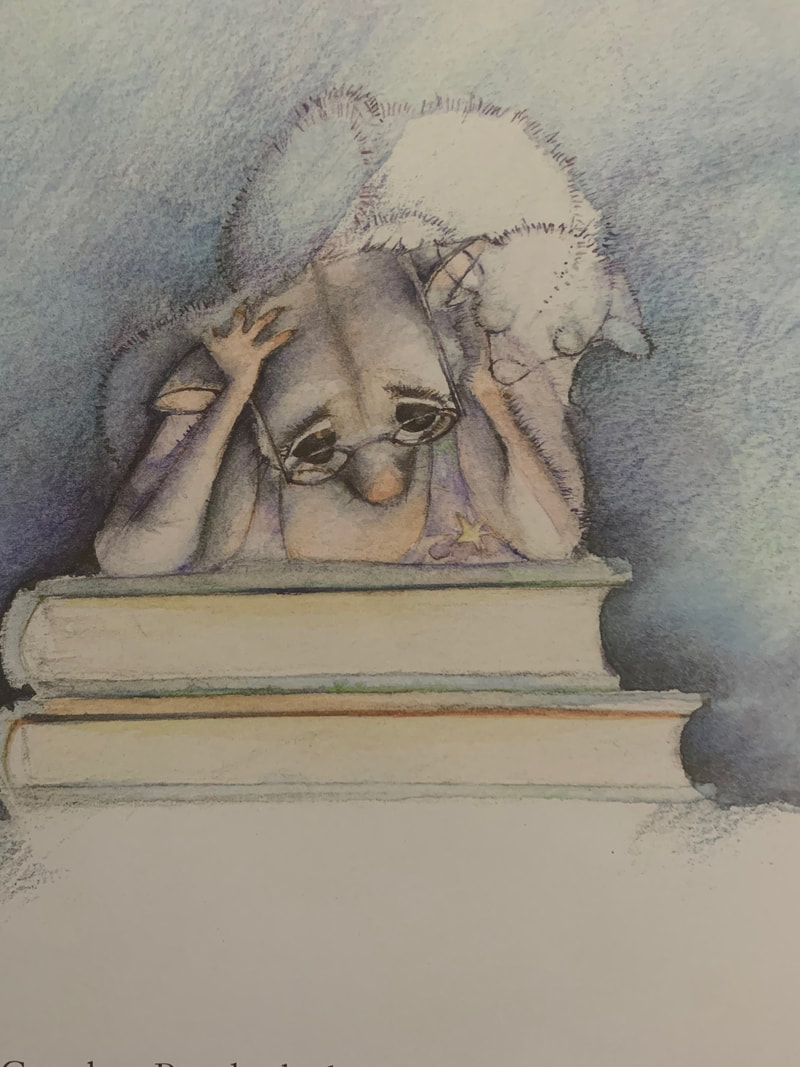
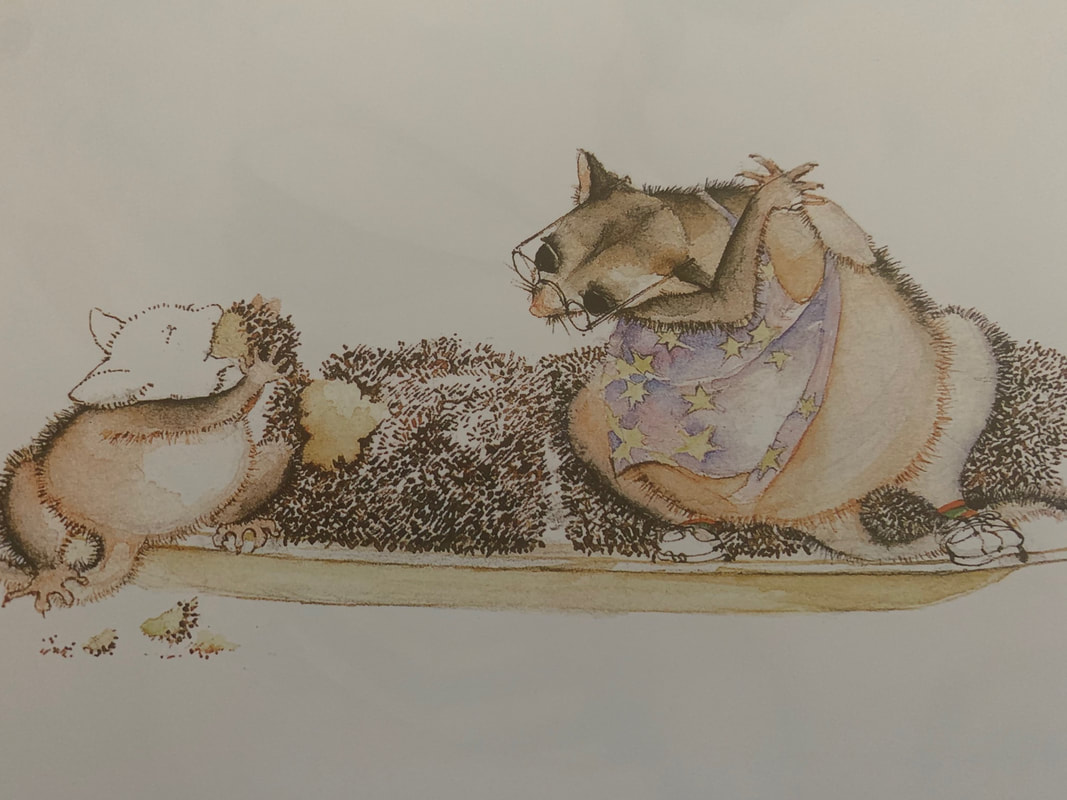
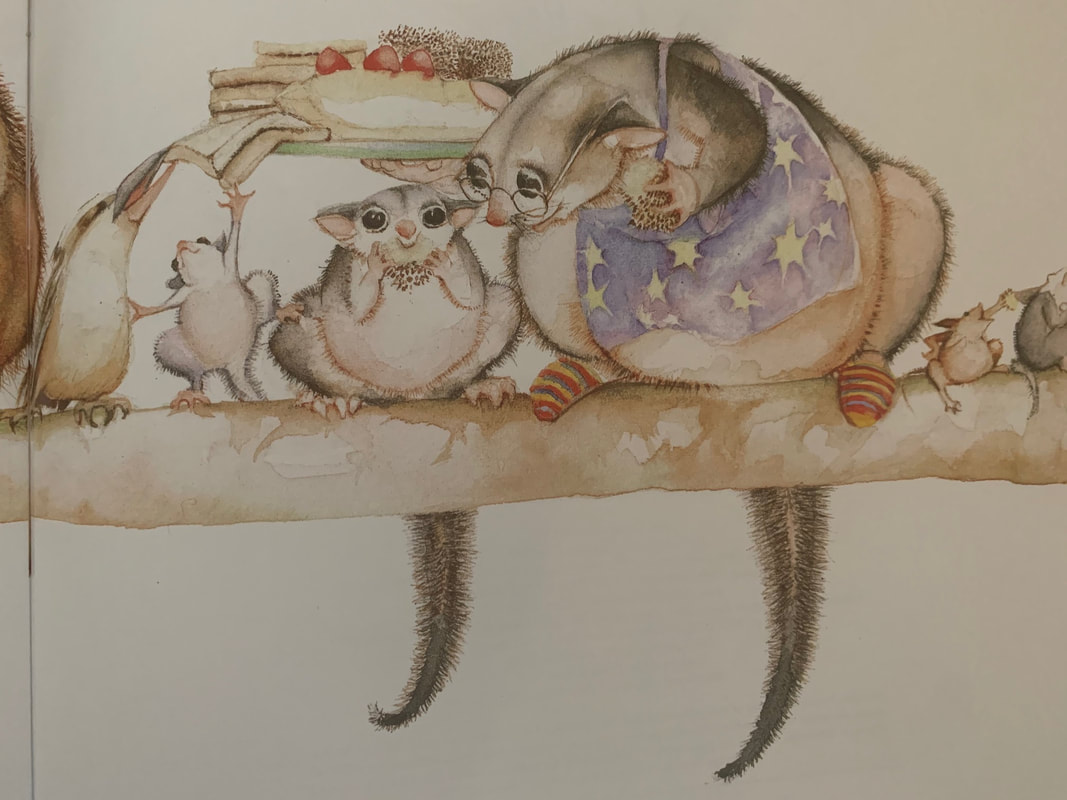
Explain to students that while they are listening to the story ‘Possum Magic’ they need to think about the o,c,r because we are going to talk about them after the story. Read the book Possum Magic by Mem Fox.
EN1-7B identifies how language use in their own writing differs according to their purpose, audience and subject matter – understand that different types of texts have identifiable texts structures and language features that help the text serve its purpose.
Explain to students that they have been learning how to write retells of the stories they have been reading. Today we are going to learn how to use all the things we know about retelling stories to help us write our own stories (narratives). Explain the word narrative is another name for story. Read through prompt for Authors centre. Show students the bag with Australian animals and the books about Australian animals.
TPS: What is the structure of a narrative? What are the 3 parts that stories have? Orientation, complication, resolution.
Explain to students that while they are listening to the story ‘Possum Magic’ they need to think about the o,c,r because we are going to talk about them after the story. Read the book Possum Magic by Mem Fox.
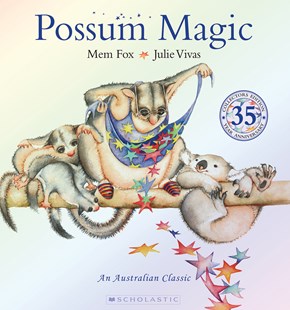
Display prepared matrix. Read title and author: Possum Magic by Mem Fox and Julie Vivas. Display the picture prompt for orientation. Model writing orientation in matrix:Grandma poss made Hush invisible to keep her safe from all the dangerous animals in the Australian bush.
TPS: Display picture prompt for complication. What is the complication? Hush wants to see what she looks like but grandmas poss has forgotten the magic to make her visible again.
TPS: Display picture prompt for resolution. What is the resolution? Hush and grandma poss travel around Australia eating people food and find all the food that makes Hush visible again.
Display picture prompt for Coda. Model coda: Every year on her birthday hush eats a bite of all the people food to make sure she always stays visible.

When we make up our stories we use the same structure that we do when retelling stories we have read. Our stories have to have an orientation, complication and resolution too! We know that stories we love to read have something interesting and exciting happen. This is usually the complication. Sometimes when we are brainstorming for our writing it makes it easier if we think about the complication first! TPS: If we wanted to write our own story about Australian animals what could the complication be? Discuss options relating to matrix. Record one idea into matrix.
This term Kindergarten are choosing to follow a similar set up and planning cycle like the new one Year One have been implementing since term 3. Kindergarten have also made some changes to way we set up, plan and teach during learning centres and the way we document our teaching.
Our K/1 teacher has had the opportunity to work with Year One teachers and students last term during their implementation of the new planning cycle (3 week cycles responsively planned based on students interests/needs and reflections, in order to deepen learning for students). Together with the IL, our K/1 teacher has worked with a Kindergarten specialist teacher to plan and teach the introductions for the learning cycle (3x Learning Centre sessions each week). Prior to the 3 week cycle, we planned 'invitations to engage' for the 4/5 centres and took the time to prepare/source the resources needed. These invitations to engage essentially remained the same for the 3 weeks; however, we did add/remove resources based on student responses. The first introduction in the cycle focused on the LISC and new centre prompts, introductions 2-5 focused on each centre (in an order responsive to student need - based on reflections after each session), and introduction 6 focused on student reflection and evaluation (we have attached the planner for more information). This planner was added to each session and shared with the relevant staff involved in working with students during learning centre time.
Set up of learning centres has also been a lot easier this way and rather than one teacher setting up and rotating, we set up collaboratively. Like Year One, we have set up a trolley for each learning centre that has the word cards, paper, scrapbook and sign on sheet in the top tray; centre name, LISC flowchart and writing materials in the second tray; and the 'invitation to engage’ prompt and resources in the bottom tray. This is placed beside each centre for easy set up and pack up. Moving forward we took photos of the set up with the new prompts and these will be shared with all teachers involved to help with setting up the relevant invitations to play appropriately. We will need to continue to teach students to pack up appropriately and revisit these expectations each session to make sure everything is packed away properly so it is ready to use the following session. We will also need to look into how the students have access to additional resources that are not directly linked to the 'invitation to engage’ to allow for child choice. Unlike Year One, at this stage Kindergarten learning centre resources are kept in large plastic tubs that are not easily accessed by the students (not on shelves like in Year 1).
Over the course of the first 3 week planning cycle, we have noticed that these changes have had a positive impact on student learning and teacher planning! The changes have maximised student engagement by modelling using our imagination, thinking, talking and sharing our learning and building students oral language and vocabulary through engaging, creative play experiences. Students are motivated to engage with the various materials provided, they are talking and role playing with their peers and they are supported to use their imagination while thinking about how they can engage with the various prompts for learning in each centre. Appropriate scaffolding is provided by the teachers during the carefully considered set up as well as questioning and prompting during interactions while playing. Teacher planning has been reflective and responsive as lesson introductions have been structured to flow on from one another, building on prior learning and addressing the skills needed to successfully engage with the learning prompt at each centre – ‘invitation to engage’.
We found that by focussing on one prompt – Invitation to engage/play, students were not overwhelmed by too much ‘clutter’ on the tables and their learning was more focussed.
We will continue to implement Kindergarten Learning Centres using this format and a new teacher will plan the next cycle with the previous teacher to support this process.
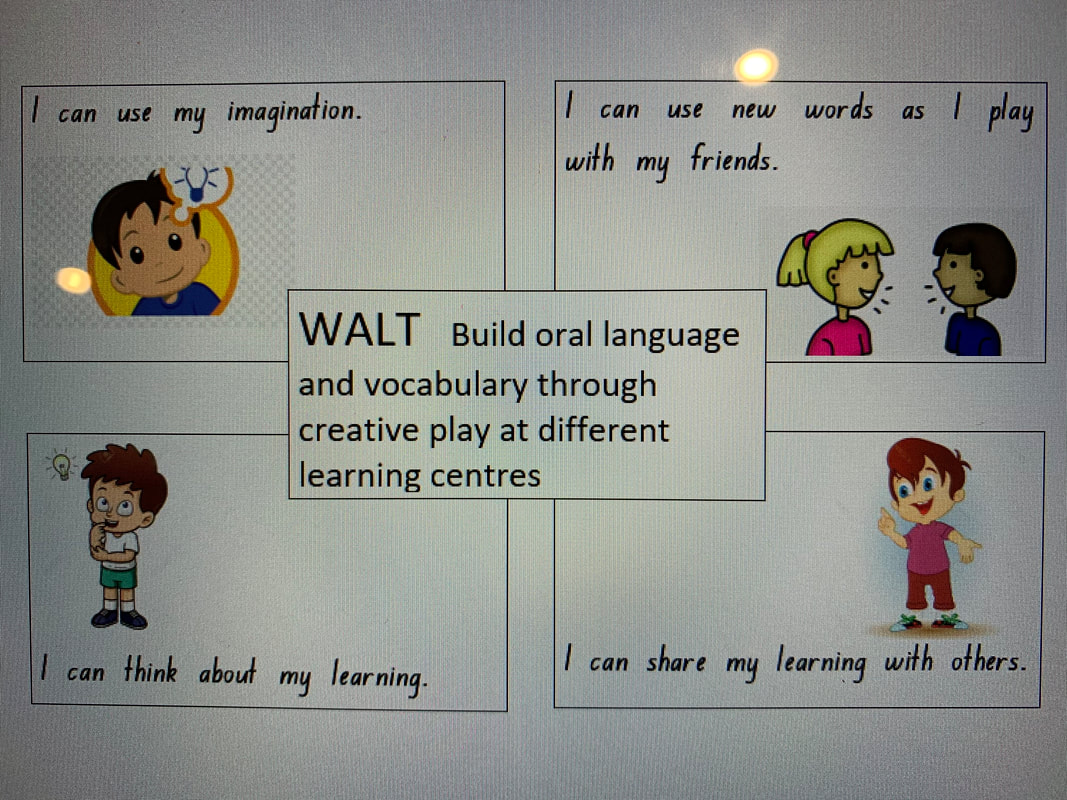
For the first session in the new cycle, the big idea learning intention and success criteria was explicitly taught. We revised the learning intention and displayed the new LISC chart. We explained that to be successful learners at learning centres, we need to use our imagination, use new words as we play, think and talk about our learning.
The focus of the first session was about using our imagination more closely. We asked students ‘what does it mean to use our imagination? And to think about what imagination means and how it helps us to learn while watching the Sesame Street video ‘Imagination Word of the Day’ Sesame Street: Imagination (Word of the Day Podcast) https://www.youtube.com/watch?v=xYSLo7eVLDQ
We then TPS (think, pair, shared) what does imagination mean and how does it helps us to learn and scribed student responses. We discussed Imagination as using our minds to create wonderful things to become anything you want to be. Students then watched another video from Sesame Street: Bert's Imagination https://www.youtube.com/watch?v=HDlwRkKnNWM which showed examples of how to use your imagination to create a story.
Students were asked to TPS ‘use your imagination to think about what you would want to be and share it with your partner’. Once students understood what imagination is they were encouraged to use their imagination while playing in the various learning centres. We walked through each centre: Story centre, construction, ocean centre, pizza shop and pointed out the prompt and the resources at each centre. We asked….What is it asking me to do, how can I use my imagination, what resources do I need to use?
Story Centre: How can I share a story with others?
Construction Centre: Can you build a bridge using different materials?
Pizza shop: Can you make a pizza and share it with others?
Ocean Centre: Create and describe your own sea creature.
After students finished the learning centres session, we reiterated the LISC and asked students if they were successful using their imagination in Learning Centres today.
MA1‑6NA uses a range of mental strategies and concrete materials for multiplication and division
Mathematicians Centre prompt:
Mathematicians: Investigating Mathematical Stories
Revisit what we have previously learnt in learning centres and how we have made our learning successful. Inform students that today we will be having a tour of our new prompts at our centres.
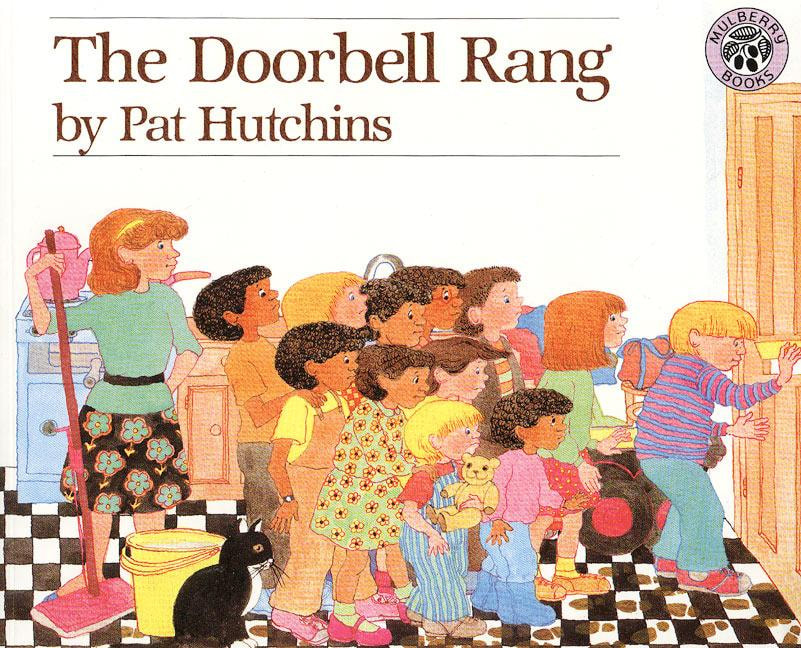
Introduce the prompt for the mathematical centre. Today we are looking at how we can use story telling in maths. We have been looking at story telling in literacy but we can also use storytelling in maths. As a mathematical storyteller we need to read the story and work out what the mathematical problem is in that story. Sometimes the story wants us to solve an addition problem or a multiplication problem. Listen to Pat Hutchins book ‘When the Doorbell Rang’. After listening to the story, ask students to TPS what kind of mathematical problem is the story about? i.e. sharing cookies. What happened each time a new child came to visit Sam and Victoria?
Today I want to use this story and make it into a mathematical problem. E.g. Share 12 cookies with 4 children.
On the board draw 4 children and have on pre-made paper, 12 cookies. Ask students how can I share these cookies equally? Once the problem has been solved, ask students if we can share the cookies with 6 children just like in the story. How can I now share these cookies with 6 children instead of 4? Do I need to get more cookies or would I need to re-distribute the cookies? Students TPS what they think would be the best way to solve this.
Students then walk through to each centre: Authors, Mathematicians, Inventors and Explorers. Teacher points out the ‘Together we’ flowchart, the prompt and the resources at each centre. How can I plan for the prompt question, what is it asking me to do, what idea/s can I come up with, what resources do I need to use?
Author’s Centre: Make up a story! (story bags – show students prepared example)
Mathematician’s Centre: Investigating mathematical stories (mathematical stories – show students prepared example)
Inventor’s Centre: Design a playground! (photos of playground – show students prepared example)
Explorer’s Centre: Conduct an experiment! (3 experiments –show students prepared example)
Mathematicians Centre prompt:
Mathematicians: Investigating Mathematical Stories
- Choose a mathematical story.
- Read it with a partner or in a group.
- Find and talk about the maths!
- Solve the investigation and record your answer using numbers, pictures, words or photos.
Revisit what we have previously learnt in learning centres and how we have made our learning successful. Inform students that today we will be having a tour of our new prompts at our centres.
Introduce the prompt for the mathematical centre. Today we are looking at how we can use story telling in maths. We have been looking at story telling in literacy but we can also use storytelling in maths. As a mathematical storyteller we need to read the story and work out what the mathematical problem is in that story. Sometimes the story wants us to solve an addition problem or a multiplication problem. Listen to Pat Hutchins book ‘When the Doorbell Rang’. After listening to the story, ask students to TPS what kind of mathematical problem is the story about? i.e. sharing cookies. What happened each time a new child came to visit Sam and Victoria?
Today I want to use this story and make it into a mathematical problem. E.g. Share 12 cookies with 4 children.
On the board draw 4 children and have on pre-made paper, 12 cookies. Ask students how can I share these cookies equally? Once the problem has been solved, ask students if we can share the cookies with 6 children just like in the story. How can I now share these cookies with 6 children instead of 4? Do I need to get more cookies or would I need to re-distribute the cookies? Students TPS what they think would be the best way to solve this.
Students then walk through to each centre: Authors, Mathematicians, Inventors and Explorers. Teacher points out the ‘Together we’ flowchart, the prompt and the resources at each centre. How can I plan for the prompt question, what is it asking me to do, what idea/s can I come up with, what resources do I need to use?
Author’s Centre: Make up a story! (story bags – show students prepared example)
Mathematician’s Centre: Investigating mathematical stories (mathematical stories – show students prepared example)
Inventor’s Centre: Design a playground! (photos of playground – show students prepared example)
Explorer’s Centre: Conduct an experiment! (3 experiments –show students prepared example)
WALT think about audience and purpose when creating a robot.
WALT discuss the purpose and use of our design and communicate this with others.
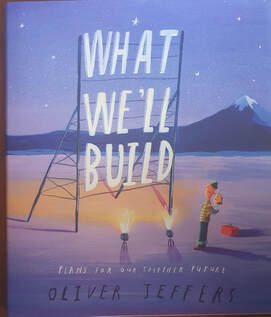
Introduce the text "What We'll Build". Read the text to the students.
Teacher; I noticed during the text that the author had a reason for building the certain things "We'll build a house to be our home, We'll build a fortress to keep enemies out".
This got me thinking about the engineers centre and all the wonderful things you've been building but not thinking about a real purpose for building.
Talk about the importance of purpose and audience when doing anything (link to writing). Talk about the purpose of making things in the engineers centre;
Watch a short clip about how to navigate WeDo website to create other robots.
https://www.youtube.com/watch?v=fWxU7VOwovw
WALT discuss the purpose and use of our design and communicate this with others.
Introduce the text "What We'll Build". Read the text to the students.
Teacher; I noticed during the text that the author had a reason for building the certain things "We'll build a house to be our home, We'll build a fortress to keep enemies out".
This got me thinking about the engineers centre and all the wonderful things you've been building but not thinking about a real purpose for building.
Talk about the importance of purpose and audience when doing anything (link to writing). Talk about the purpose of making things in the engineers centre;
- What is the structure you made?
- Why did you make it?
- Who is it for?
- How does it work?
- What is its purpose?
Watch a short clip about how to navigate WeDo website to create other robots.
https://www.youtube.com/watch?v=fWxU7VOwovw
EN1-7B understand that different types of texts have identifiable text structures and language features that help the text serve its purpose (ACELA1447, ACELA1463)
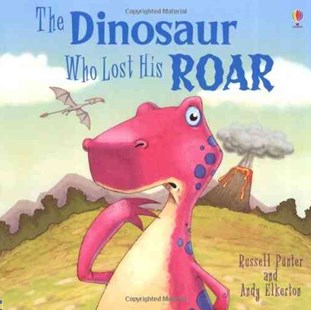
Revise Walt and SC. Explain to students that today we are looking at the Author’s centre. The focus is on narrative writing. In the authors centre students can retell a story or compose a story of their own using the resources provided. TPS: “What is the structure of a narrative?” (OCR). Read the “Dinosaur who Lost his Roar”. Orally, go through the structure together with the students. (The Orientation introduces the character – who is in the story, the setting – where the story took place, when the story took place; Complication – the problem the character faced; Resolution – how the problem was resolved; and coda – “he lived happily ever after”).
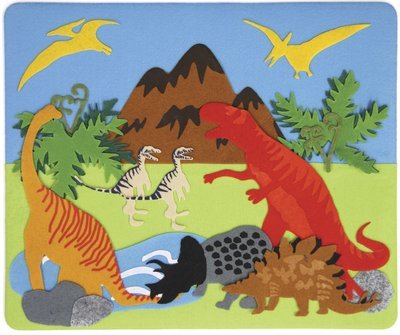
Explain to students that they can retell this story using the felt boards or make up a story of their own about dinosaurs. Share with students a story you have created about dinosaurs. (Have a felt board already set up with the complication scene). Have a simple sentence written e.g ‘The dinosaur stepped on a bush’. Ask students what we could add to this sentence to give the reader more details. How can we make this a 'wow' sentence? Explain to students’ authors use adverbs and adjectives to make their writing more interesting and help the audience to connect with their characters. Explain adverbs are words that add meaning to a verb. They tell us when, where or how something is done. Explain adjectives are describing words. Use Word cards to give a few examples. Now go back to our simple sentence and ask the students what additional descriptive words we could add.
Reread the edited sentence. Ask students to close their eyes and to listen to this sentence “The big ferocious dinosaur wasn’t watching where he was walking and stepped on a prickly bush hurting his foot.” When we add adjectives to our sentence the audience is able to paint a picture in their mind about. This is what you are going to do at the Author’s centre. You can also think of a way to share your story. You may like to make a book, a video, or share your learning in another way.
Revise Walt and SC. Explain to students that today we are looking at the Author’s centre. The focus is on narrative writing. In the authors centre students can retell a story or compose a story of their own using the resources provided. TPS: “What is the structure of a narrative?” (OCR). Read the “Dinosaur who Lost his Roar”. Orally, go through the structure together with the students. (The Orientation introduces the character – who is in the story, the setting – where the story took place, when the story took place; Complication – the problem the character faced; Resolution – how the problem was resolved; and coda – “he lived happily ever after”).
Explain to students that they can retell this story using the felt boards or make up a story of their own about dinosaurs. Share with students a story you have created about dinosaurs. (Have a felt board already set up with the complication scene). Have a simple sentence written e.g ‘The dinosaur stepped on a bush’. Ask students what we could add to this sentence to give the reader more details. How can we make this a 'wow' sentence? Explain to students’ authors use adverbs and adjectives to make their writing more interesting and help the audience to connect with their characters. Explain adverbs are words that add meaning to a verb. They tell us when, where or how something is done. Explain adjectives are describing words. Use Word cards to give a few examples. Now go back to our simple sentence and ask the students what additional descriptive words we could add.
Reread the edited sentence. Ask students to close their eyes and to listen to this sentence “The big ferocious dinosaur wasn’t watching where he was walking and stepped on a prickly bush hurting his foot.” When we add adjectives to our sentence the audience is able to paint a picture in their mind about. This is what you are going to do at the Author’s centre. You can also think of a way to share your story. You may like to make a book, a video, or share your learning in another way.
 |  |
What are the physical features of an environment?
After introducing the Geographer’s Centre the previous week, it was noticed that the students were struggling with identifying and finding the physical features of an environment. The term” physical features” was troubling them. This week I decided to model the Geographer’s Centre again, clarifying the term “physical features for them and looking at and identifying different environments.
After a brief recap of what students have been doing in the Geographer’s Centre, using a PowerPoint presentation we looked at the term features and physical features. Using an example of facial features we looked at and identified the features on the face, noting that eyes, ears, nose, etc are features on the face. Using that knowledge I displayed an image of a forest environment, gave the students some examples of features in a forest environment and then asked them to find more. I then introduced the term natural and man-made and explicitly defined both terms. Students identified different natural features from images displayed. We then looked at the term man-made and identified man-made features in an image. Students identified many features in the environment and identified whether it was natural or man-made.
In their centres students choose to draw and label different environments, labelling the different features in that environment and classifying them whether they are natural or man-made.

Personal and Social Capabilities- Social Management: work collaboratively, make decisions, negotiate and resolve conflict
ST1-11DI-T - Recognise and explore digital systems (hardware and software components) for a purpose (ACTDIK001).
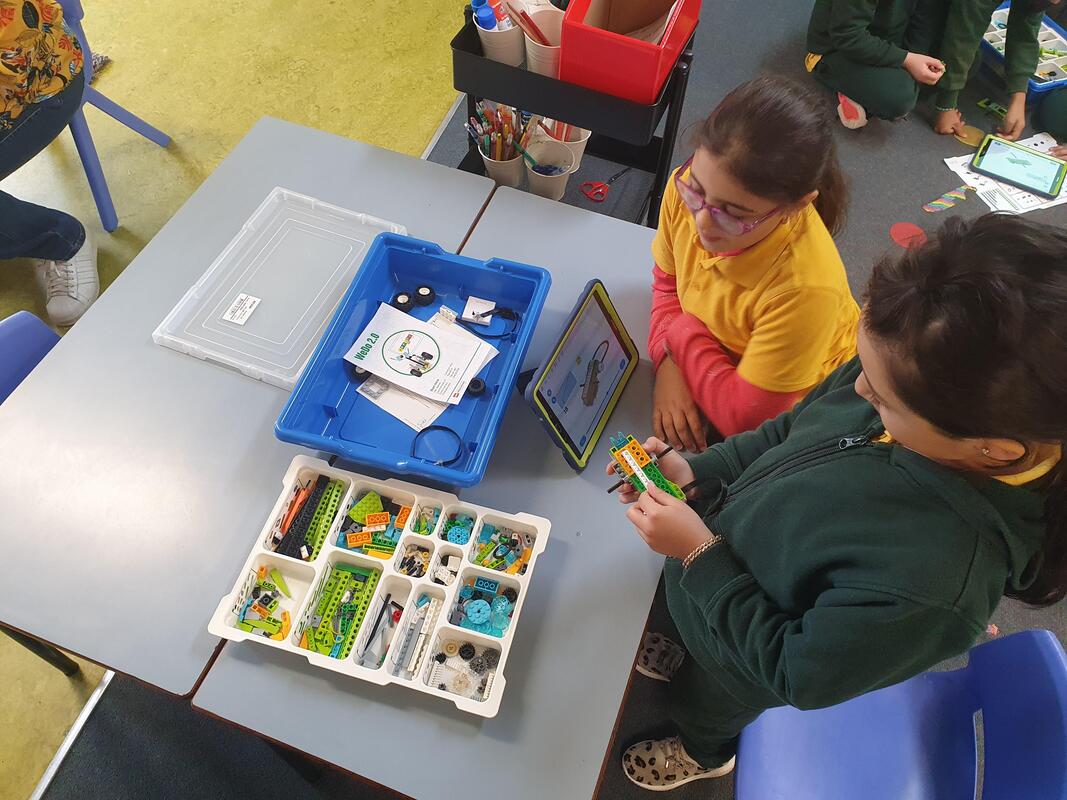
Remind students that last term we talked about collaboration. Collaboration is when we work together to share our ideas, listen to others ideas, make decisions and practice solving conflict (problems). Share the poster that the group jointly constructed about what collaboration looks like in learning centres. Remind students that collaboration can help make their learning stronger in all the centres. Share with students that the teachers have noticed that one centre where practising collaboration skills is a bit challenging at the moment is the inventor’s centre because the students all excited to be working with the bee bots and want to have a turn experimenting with how they work. So today we are going to talk about what our learning in the inventor’s centre can look like and how working as a team can help our thinking.
Show students the bee bot. Explain that the bee bot is a device that can be programmed to follow a set of commands or instructions. It is a new piece of technology that we don’t know very much about yet. TPS: When you first get this technology how do you know how to work it? You need to experiment with it by pressing the buttons, making observations about it what it does, asking questions, talking to each other about the different things you’ve noticed.
Explain to the students that because part of their learning is going to be asking questions and talking to each other they need to work in pairs or small groups. Everyone will also want to have a turn to touch the bee bot and do some exploring and tinkeringso the group can’t be too big. Working in pairs or groups of 3 will be best for this centre.
ST1-11DI-T - Recognise and explore digital systems (hardware and software components) for a purpose (ACTDIK001).
Remind students that last term we talked about collaboration. Collaboration is when we work together to share our ideas, listen to others ideas, make decisions and practice solving conflict (problems). Share the poster that the group jointly constructed about what collaboration looks like in learning centres. Remind students that collaboration can help make their learning stronger in all the centres. Share with students that the teachers have noticed that one centre where practising collaboration skills is a bit challenging at the moment is the inventor’s centre because the students all excited to be working with the bee bots and want to have a turn experimenting with how they work. So today we are going to talk about what our learning in the inventor’s centre can look like and how working as a team can help our thinking.
Show students the bee bot. Explain that the bee bot is a device that can be programmed to follow a set of commands or instructions. It is a new piece of technology that we don’t know very much about yet. TPS: When you first get this technology how do you know how to work it? You need to experiment with it by pressing the buttons, making observations about it what it does, asking questions, talking to each other about the different things you’ve noticed.
Explain to the students that because part of their learning is going to be asking questions and talking to each other they need to work in pairs or small groups. Everyone will also want to have a turn to touch the bee bot and do some exploring and tinkeringso the group can’t be too big. Working in pairs or groups of 3 will be best for this centre.
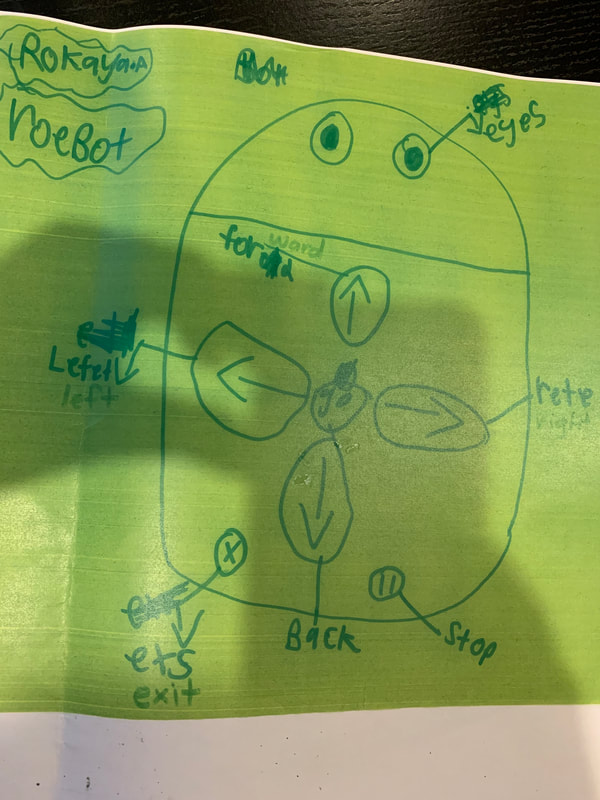
Rokaya's Diagram
Show the children the diagram Rokaya created with the buttons of the bee bot labelled with the basic commands. Explain that they can use this diagram and the selection of commands cards (resource in the centre) to investigate what they can make the Bee-Bot do in the inventor’s centre. Share with students some ideas of what their learning could look like in the centre. Students could use a large piece of cardboard and a place a texta in the bee bot so it marks out its path as it moves along. Students take turns inputting a command into the bee bot (by pressing the button) and write down their instruction as they program their bee bot. The could see if they can follow the directions to make the bee bot follow the exact same path, they may even like to swap instructions with another group. Students could use the grid mats and toy figurines to create obstacles for the bee bot to move around to challenge their thinking. Students could think of a way to share what they have found out about the bee bots, just like Rokaya. They might like to create a diagram or a set of instructions to help someone who has never used a bee bot before.
ST1-WS-S: record observations accurately and honestly using observational drawings, labelling, informal measurements and digital technologies (ACSIS026, ACSIS039)
Using student work samples from Thursday unpack WALT and SC. Refer to planning flowchart and ask students: What did they do to plan carefully? How did they challenge/deepen their learning?(they revisited their plan, amended it and went back to creating. Then they shared their work with the class.) Now ask those students who shared their learning “where to next in their learning?” Explain that the students shared quality learning and all of the students in Year One can do this by going back and revisiting their own work to make it even better. Explain to the students that this is what we have been thinking about when writing our learning stories. We are going to watch a video about a student named Austin who improved his work by revisiting it and making changes just like these students in Year One have done. (Some of you have seen this video before, but that’s ok, because each time we watch and listen we have the opportunity to see something new that we may not have noticed before.) Show students Austin’s Butterfly video:
Using student work samples from Thursday unpack WALT and SC. Refer to planning flowchart and ask students: What did they do to plan carefully? How did they challenge/deepen their learning?(they revisited their plan, amended it and went back to creating. Then they shared their work with the class.) Now ask those students who shared their learning “where to next in their learning?” Explain that the students shared quality learning and all of the students in Year One can do this by going back and revisiting their own work to make it even better. Explain to the students that this is what we have been thinking about when writing our learning stories. We are going to watch a video about a student named Austin who improved his work by revisiting it and making changes just like these students in Year One have done. (Some of you have seen this video before, but that’s ok, because each time we watch and listen we have the opportunity to see something new that we may not have noticed before.) Show students Austin’s Butterfly video:
Talk to students about persevering in our work, listening to feedback and making changes to show our learning.
Explorers: Investigate the natural environment
On Thursday, Fatima shared her drawing of a bark that she examined; students gave her very specific feedback. Remind Fatima that she started a drawing on Thursday but she can make it more accurate by adding details, just like Austin! Remind Fatima that today she can use the students’ specific feedback to do a more scientific drawing of the natural object that she was examining. I wonder what Fatima will do next with her drawing. I’m looking forward to seeing it!
What might thinking creatively look like in the other centres:
Mathematician Centre: choose a prompt card, create a design, gather the blocks you are going to use for your design and build. Does it look like your plan? Do you need to go back and amend the plan and change your design? Show your thinking with numbers and words and determine how many LEGO studs you used.
Author’s Centre: students could show their learning as a poster, record a video of themselves telling a story using the felt boards as a prop.
Inventor’s Centre: students could use the grid or a blank piece of cardboard to design a path to move your bee bot along and then write down the programs steps. Can another group follow your instructions to follow the exact same path?
After students finish the learning centres session reiterate the ‘Together we’ flowchart posters during the reflection time and asks students if they used the poster to help them with the development of their work. Where are they up to in the flowchart? Do they need to go back to the same centre in the next session to finish working on their idea? Inform students that they always need to refer to the poster every time they go to the centre.
Explorers: Investigate the natural environment
- Explore the garden for different types of leaves/sticks/flowers.
- Choose something from the natural environment to look at more closely.
- Use your scientist eyes to accurately draw what you see.
- Label your picture and use words to explain what your special object looks like and feels like or show your learning in another interesting way
On Thursday, Fatima shared her drawing of a bark that she examined; students gave her very specific feedback. Remind Fatima that she started a drawing on Thursday but she can make it more accurate by adding details, just like Austin! Remind Fatima that today she can use the students’ specific feedback to do a more scientific drawing of the natural object that she was examining. I wonder what Fatima will do next with her drawing. I’m looking forward to seeing it!
What might thinking creatively look like in the other centres:
Mathematician Centre: choose a prompt card, create a design, gather the blocks you are going to use for your design and build. Does it look like your plan? Do you need to go back and amend the plan and change your design? Show your thinking with numbers and words and determine how many LEGO studs you used.
Author’s Centre: students could show their learning as a poster, record a video of themselves telling a story using the felt boards as a prop.
Inventor’s Centre: students could use the grid or a blank piece of cardboard to design a path to move your bee bot along and then write down the programs steps. Can another group follow your instructions to follow the exact same path?
After students finish the learning centres session reiterate the ‘Together we’ flowchart posters during the reflection time and asks students if they used the poster to help them with the development of their work. Where are they up to in the flowchart? Do they need to go back to the same centre in the next session to finish working on their idea? Inform students that they always need to refer to the poster every time they go to the centre.
This was the first time most students used the bee bots. It was interesting to watch the students experimenting by pressing the direction buttons and watching the way the bee bot moved. Their conversations were animated and excited as they discussed the directions the bee bot was moving in (and why it didn't appear to follow their instructions sometimes!) The students soon worked out that the bee bot remembered the previous instruction that was entered and performed the chain of instructions from beginning to end each time they pressed 'go'. We talked about using the 'x' button to clear their program when they wanted to start again.
I showed students how they could place a texta at the front of the bee bot and it would draw the path showing the instructions they inputted. The students took turns inputting a direction and watching the way the bee bot moved and drew a path on a large sheet of cardboard. The students quickly starting using the language of direction to explain the bee bots movements: 'left, right, forwards, backwards'. They worked out that they could draw shapes and were pleased with the circle they created.
I asked students if they could make the bee bot follow the exact same path. Students chose a different coloured texta to give it a go. I asked them if they could write down the directions so another group could follow them and create the exact same path. Students took turns using arrows to write the program. They tested their instructions to make sure the bee-bot followed the path.
Where to next?
Have students in the group divide into pairs. Each pair creates a set of instructions and programs their bee bot to draw a path on a sheet of cardboard. They swap instructions with each other, select a different coloured texta and see if the bee bot follows the same path.
Was it successful? Discuss why or why not? (Did students follow the procedure correctly? Is the accuracy of the instructions important? Can you record the instructions in a different way or can you only use arrows? etc.)

Multiplication MA1-6NA use a range to mental strategies and concrete materials for multiplication.
Students will use concrete materials to model multiplication by forming an array of equal rows or equal columns.
Mathematicians Centre
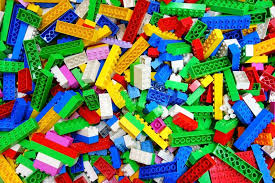
Prompt: Learning with LEGO
- Find the blocks you need to get started.
- Create your design!
- Find out how many LEGO studs you used altogether. Show your thinking with pictures, numbers and words.
Today we are learning about multiplication and how we can show our thinking about multiplication by using LEGO blocks to create designs. Now to do this, we first we need to learn about arrays. What is an array? An array is a set of equal groups in rows and columns. We are going to watch a video https://www.youtube.com/watch?v=lRgKavUxvKY Stop video at (1 min). After the video is finished use the powerpoint and pictures of blocks to explain the prompts to students. Have you noticed that most LEGO blocks are made up of arrays? Let’s look at some LEGO blocks from the top view. The studs (explain that we can call the raised dots on the LEGO block studs) on each block form an array, you can see the rows and columns just like in the video we watched! Using paddle pop sticks have a student come up to the board and circle the rows. How many rows do we have? How many studs in each row? Can we use skip counting to work out how many altogether? Next have a student come up to the board and circle the columns in a different colour. How many columns are there? Can we use skip counting to work out how many studs altogether? (Model 2-3 times using different blocks) Notice we get the same answer whether we count by ones, or in rows or columns! The number of studs doesn’t change but we can find an answer in different ways! Skip counting helps us determine the answer in a quicker way!
How do I plan? What does a plan for this centre look like? Use on of the student’s work sample to show an example (Abdulrahman’s plan). Explain how he’s thinking creatively. Refer back to anchor chart ’ Starts with an idea, using your plan as a guide, working with a team, gathering supplies, setting up a space to work, working on making or doing something slowly and carefully, reflecting on your learning and making changes, trying lots of different things, feeling frustrated if things don’t work out but persevering and trying lots of different things, choosing your best idea to share with others, feeling successful and proud once you’ve achieved your goal.
I wonder how Abdulrahman might work out how many studs he uses altogether to make his design!? If you go to the mathematician’s centre today that is your challenge! Don’t forget that the learning we have been doing about skip counting will help you!
What might thinking creatively look like in the other centres:
Explorer’s Centre: students could use their scientist eyes to accurately draw what they see in the natural environment, such as different flowers, sticks leaves; write a description with a detailed picture or photos, they can use the ipads to take photos
Author’s Centre: students could show their learning as a poster, record a video of themselves telling a story using the felt boards as a prop
Inventor’s Centre: students could use the grid or a blank piece of cardboard to design a path to move your bee bot along and then write down the programs steps. Can another group follow your instructions to follow the exact same path?
Students will use concrete materials to model multiplication by forming an array of equal rows or equal columns.
Mathematicians Centre
Prompt: Learning with LEGO
- Use only 1x2 blocks to build a tall tower.
- Use only 2x2 blocks to build a plane.
- Use only 4x2 blocks to build a rocket.
- Use blocks with 4 studs to build a ship.
- Use blocks with 6 studs to build anything you like!
- Find the blocks you need to get started.
- Create your design!
- Find out how many LEGO studs you used altogether. Show your thinking with pictures, numbers and words.
Today we are learning about multiplication and how we can show our thinking about multiplication by using LEGO blocks to create designs. Now to do this, we first we need to learn about arrays. What is an array? An array is a set of equal groups in rows and columns. We are going to watch a video https://www.youtube.com/watch?v=lRgKavUxvKY Stop video at (1 min). After the video is finished use the powerpoint and pictures of blocks to explain the prompts to students. Have you noticed that most LEGO blocks are made up of arrays? Let’s look at some LEGO blocks from the top view. The studs (explain that we can call the raised dots on the LEGO block studs) on each block form an array, you can see the rows and columns just like in the video we watched! Using paddle pop sticks have a student come up to the board and circle the rows. How many rows do we have? How many studs in each row? Can we use skip counting to work out how many altogether? Next have a student come up to the board and circle the columns in a different colour. How many columns are there? Can we use skip counting to work out how many studs altogether? (Model 2-3 times using different blocks) Notice we get the same answer whether we count by ones, or in rows or columns! The number of studs doesn’t change but we can find an answer in different ways! Skip counting helps us determine the answer in a quicker way!
How do I plan? What does a plan for this centre look like? Use on of the student’s work sample to show an example (Abdulrahman’s plan). Explain how he’s thinking creatively. Refer back to anchor chart ’ Starts with an idea, using your plan as a guide, working with a team, gathering supplies, setting up a space to work, working on making or doing something slowly and carefully, reflecting on your learning and making changes, trying lots of different things, feeling frustrated if things don’t work out but persevering and trying lots of different things, choosing your best idea to share with others, feeling successful and proud once you’ve achieved your goal.
I wonder how Abdulrahman might work out how many studs he uses altogether to make his design!? If you go to the mathematician’s centre today that is your challenge! Don’t forget that the learning we have been doing about skip counting will help you!
What might thinking creatively look like in the other centres:
Explorer’s Centre: students could use their scientist eyes to accurately draw what they see in the natural environment, such as different flowers, sticks leaves; write a description with a detailed picture or photos, they can use the ipads to take photos
Author’s Centre: students could show their learning as a poster, record a video of themselves telling a story using the felt boards as a prop
Inventor’s Centre: students could use the grid or a blank piece of cardboard to design a path to move your bee bot along and then write down the programs steps. Can another group follow your instructions to follow the exact same path?
| lego.pptx |
Student A - Student A was in the safari centre and came up with a great story. She started off by drawing a picture and talking about it. Student A used the container in the safari centre as a cage. Her story was about a group of zoo animals that were stuck in a cage but wanted to escape and return to the safari.
Student B was also in the safari centre and he was drawing the habitat of the animals he was playing with. After that, he wrote about where the crocodile lives and what kind of food the tiger eats.
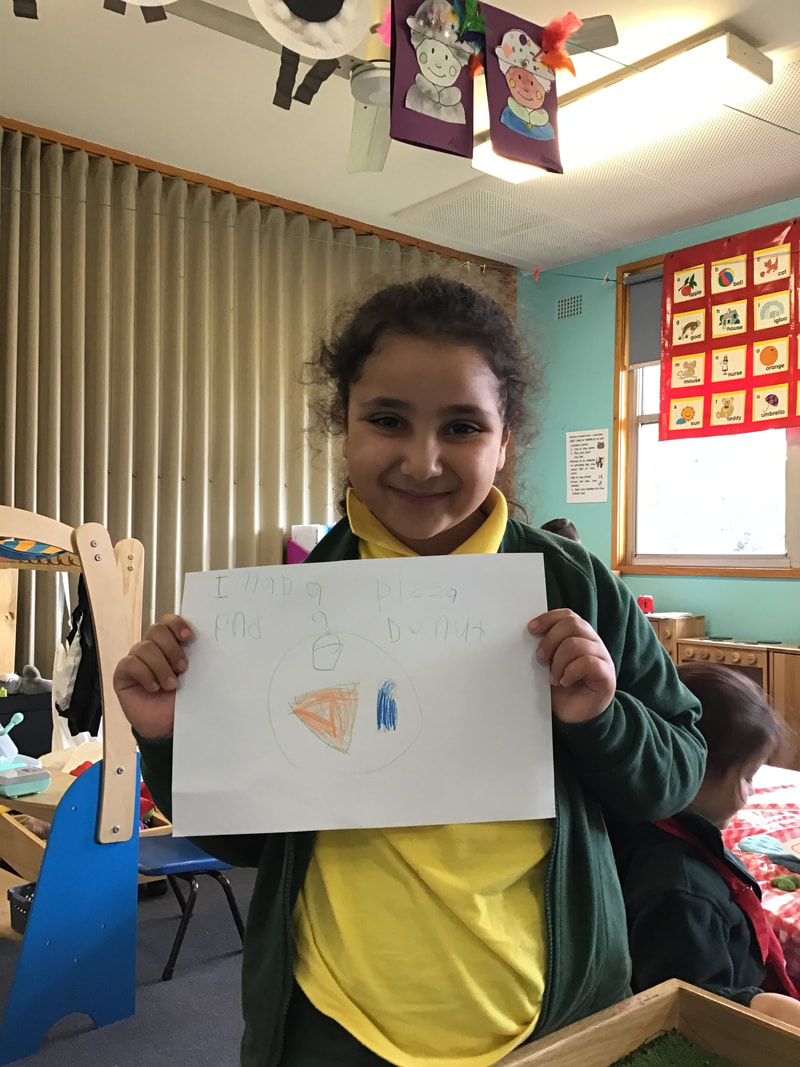
Student C was in the pizza shop and wrote down her order. She ordered a pizza with chilli and a donut. It was great to see student C realise she needed to use the ch digraph, learnt in word work, to write the word chilli. She has been struggling to differentiate between the sh and ch digraph but seems to be understanding the difference now.
Mrs H
Student B was also in the safari centre and he was drawing the habitat of the animals he was playing with. After that, he wrote about where the crocodile lives and what kind of food the tiger eats.
Student C was in the pizza shop and wrote down her order. She ordered a pizza with chilli and a donut. It was great to see student C realise she needed to use the ch digraph, learnt in word work, to write the word chilli. She has been struggling to differentiate between the sh and ch digraph but seems to be understanding the difference now.
Mrs H

Author
Blog about our K-2 learning centres, written by teachers and for teachers!
 RSS Feed
